About Screen Printing
A Brief History of Screen Printing
Screen printing, also known as serigraphy, has a surprisingly long history. Its origins date back to ancient China, around 1000 AD, where stencils and silk screens were used to transfer patterns onto fabrics. From there, the technique spread to Japan and other parts of Asia, where it further developed.
The basics of screen printing reached Europe in the Middle Ages, but the real development occurred at the turn of the 19th and 20th centuries. At that time, fine silk meshes began to be used (hence the name "serigraphy" – seri = silk, graphy = writing/drawing) along with the first stencil techniques.
In the 1930s, the first photosensitive emulsions were developed, allowing more precise and finer transfer of detailed motifs onto the screen using light. This innovation revolutionized the printing process.
In the second half of the 20th century, screen printing became popular thanks to pop-art artists, especially Andy Warhol. His famous repeated portraits of Marilyn Monroe and Campbell's soup cans became icons of modern art and showed that screen printing has a place in fine arts as well.
Today, screen printing is used both in industrial production (such as printing T-shirts, posters, and packaging) and in home studios and among hobbyists for handmade creations.

Home Screen Printing Guide – Step by Step
1. Prepare the Graphic and Film Stencil
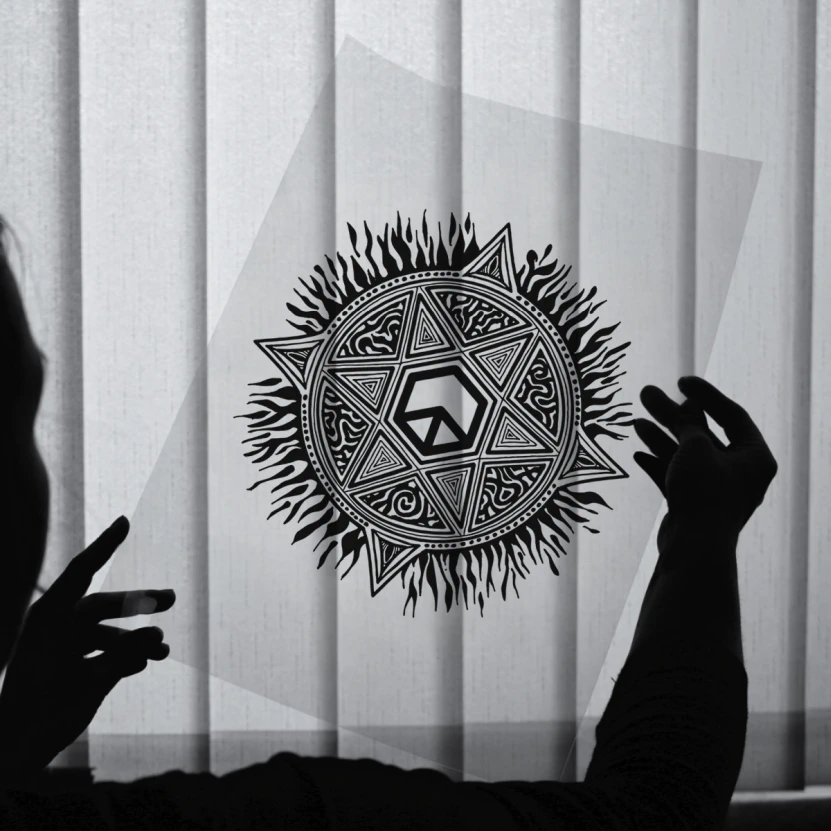
First, design your motif in a graphic program (e.g., Adobe Illustrator, Inkscape) and prepare it in black and white with sharp contours. Print the motif onto a special transparent film. A quality film ensures that UV light during exposure does not pass where it shouldn’t and that the stencil forms correctly. Laser or highly pigmented inkjet printing is recommended.
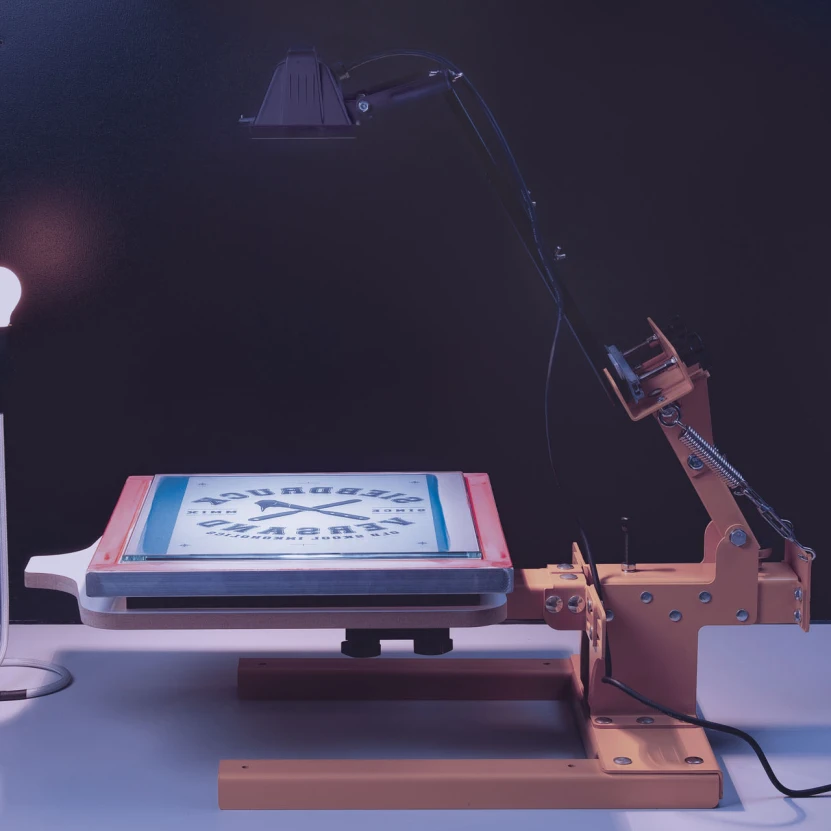
2. Choose the Right Frame and Screen
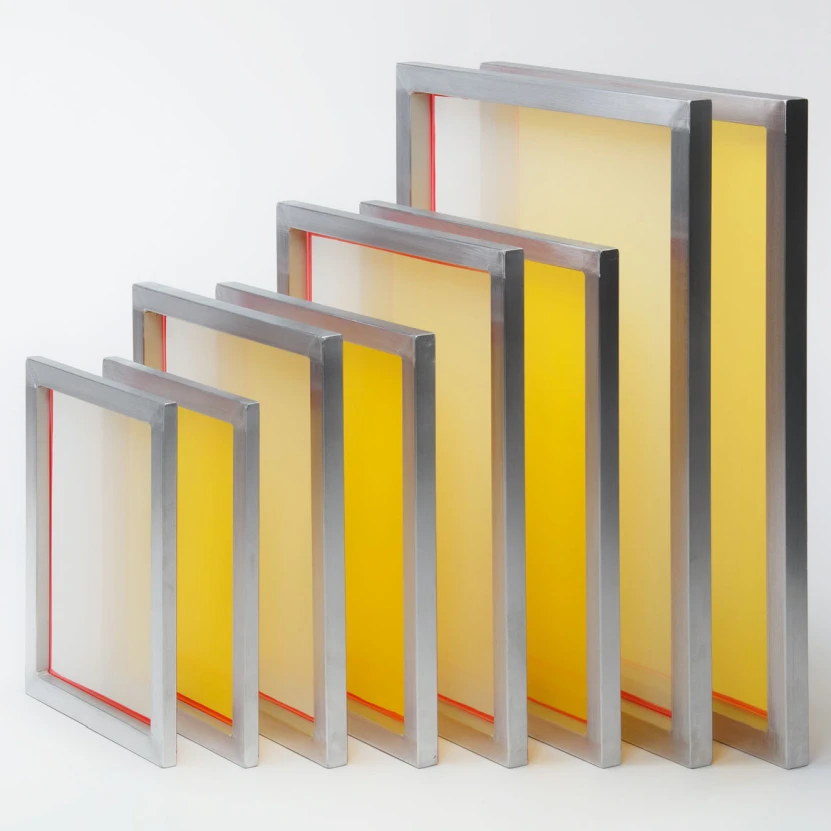
For successful screen printing, the proper frame and screen are key. The frame must be sturdy and durable, often wooden or aluminum, so it does not warp. Choose the screen mesh based on the detail of the motif – finer mesh (100–120T) is suitable for small details and precise lines, while coarser mesh is better for solid colors and thick layers. The screen must be evenly tensioned to avoid distortion during printing.
3. Degreasing and Preparing the Screen
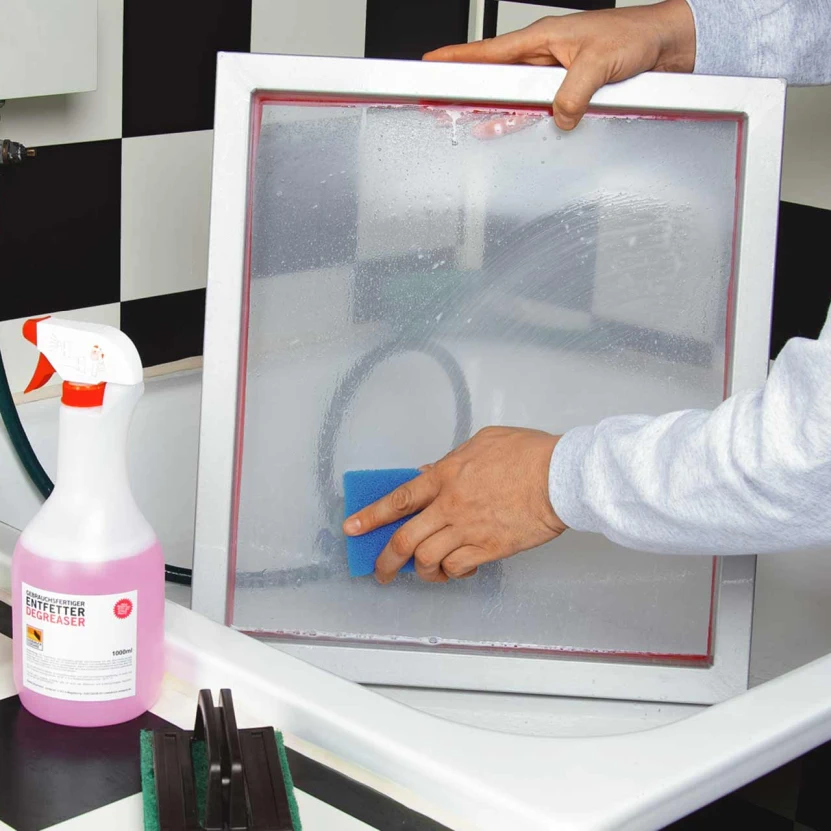
Before applying the emulsion, the screen must be thoroughly degreased because grease or dirt prevent proper adhesion of the emulsion. Use a special cleaner made for screen printing, apply it to the screen and let it act briefly, then rinse thoroughly with water. After degreasing, let the screen dry in a clean, dust-free environment. Proper preparation ensures the emulsion layer will be even and strong, which is crucial for stencil accuracy and durability. Don’t skip this step, as any grease can cause printing problems even after exposure.
4. Applying the Photo Emulsion
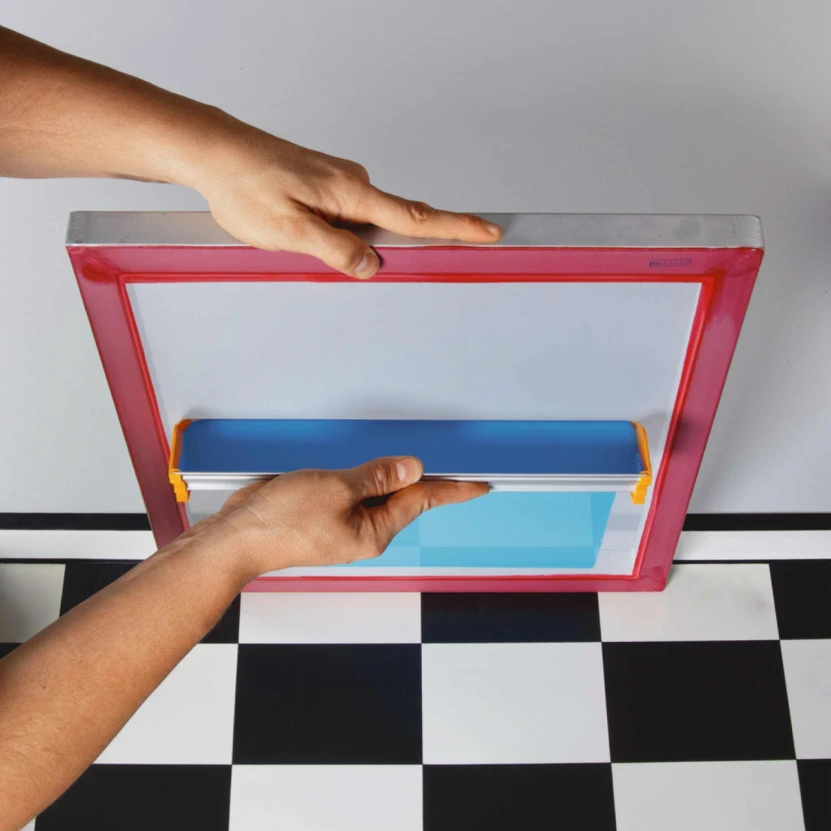
Apply the emulsion evenly on both sides of the screen using an emulsion scoop coater, first on the printing side (the side where the red screen glue is visible), then on the back side. It’s best to do this under red light since the emulsion is sensitive to UV and violet-blue light. Apply the emulsion in a thin layer so that the motif’s details are preserved but the stencil is still strong enough. After application, let the screen dry horizontally in the dark, ideally at around 30–40°C. Beginners are recommended to use a heated fan with ventilation, but avoid too high drying temperatures as it can “bake” the emulsion into the screen, making later removal difficult. Well-dried emulsion is key for successful exposure and long stencil life.
5. Exposing the Stencil
Place the transparent film with the motif onto the dry emulsion and ensure firm contact. Use a lamp with sufficient power and expose for 3 to 5 minutes, depending on the emulsion thickness and lamp power. The light hardens the emulsion where it is transparent and leaves it soft where the film is dark. After exposure, let the screen rest briefly, then proceed with developing the motif. Correct exposure is crucial for stencil cleanliness and durability, so it’s better to perform several tests.
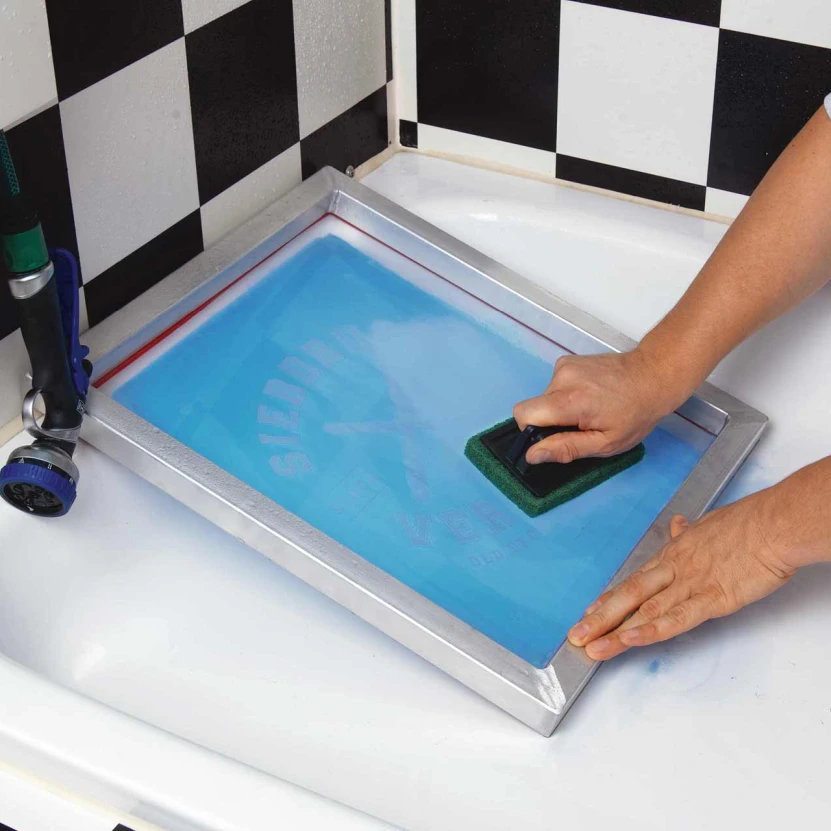
6. Developing the Stencil
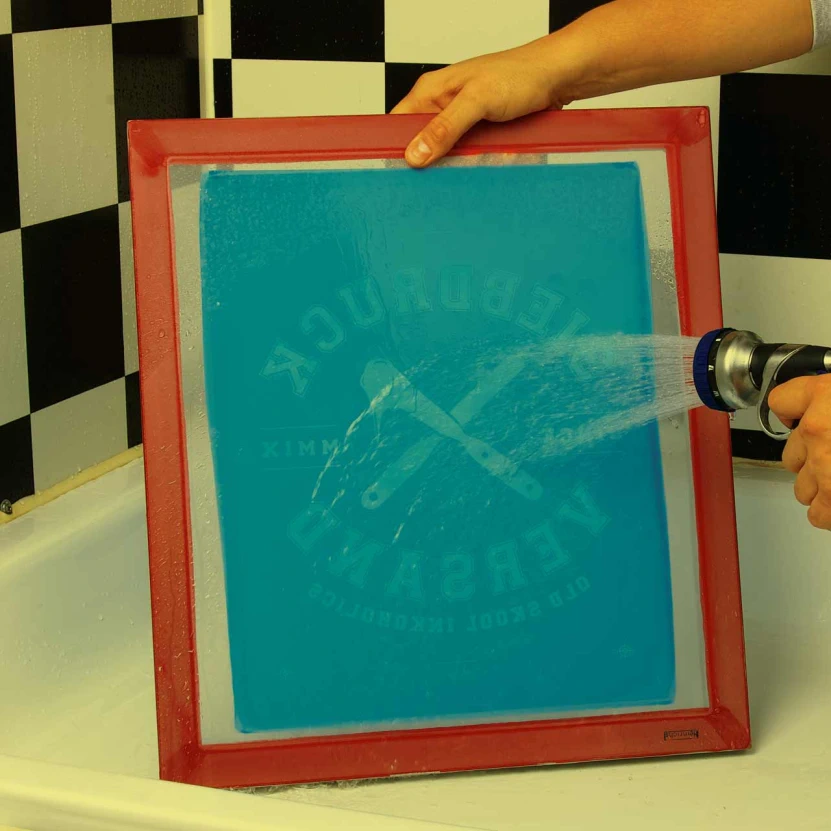
After exposure, rinse the screen with lukewarm water to dissolve the “unexposed” emulsion in the motif areas, creating open areas for the ink to pass through. Use medium water pressure to avoid damaging details. After rinsing, the motif will appear as transparent areas on the mesh. Small imperfections can be fixed with a brush and some emulsion, which can then be re-exposed. After developing, let the screen dry and check that the motif is clean and free of emulsion residues.
7. Preparing the Printing Table
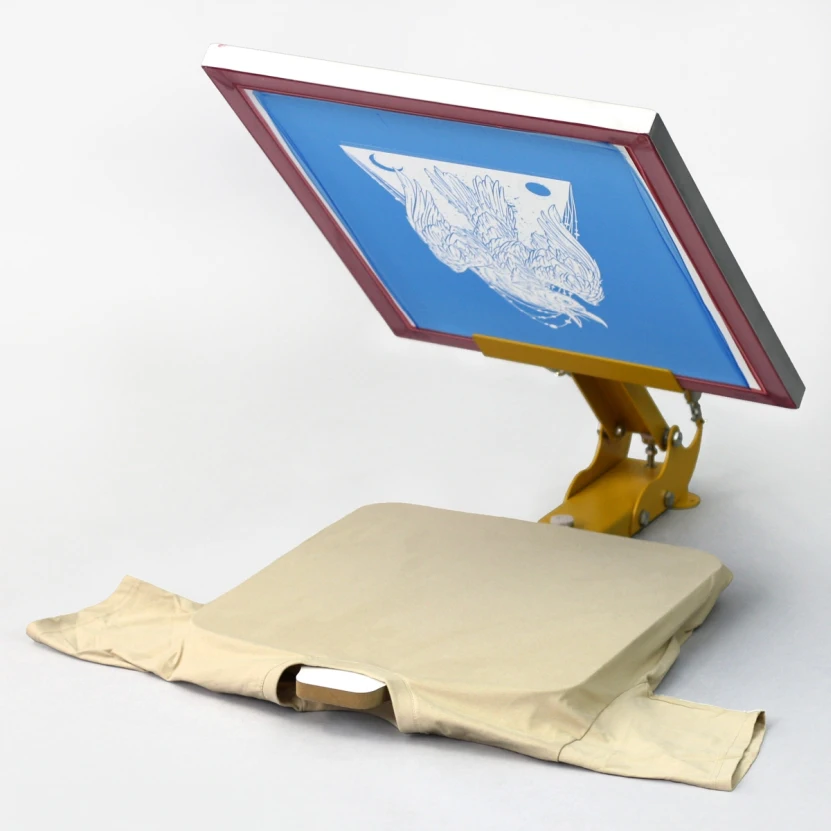
Prepare the printing table or workspace where you will do the printing. Place the material you want to print on (paper, textile, cardboard) exactly where you want the motif. Fix the frame with the stencil so that the correct height above the substrate is maintained – ideally about 2–5 mm, so the fabric or paper does not touch the emulsion and does not block ink passage. Because the edges of the screen printing frame are always open and ink might accidentally seep through during printing, it’s advisable to cover them with adhesive tape. Proper frame stability is important for accurate motif repetition.
8. Applying Ink and Printing
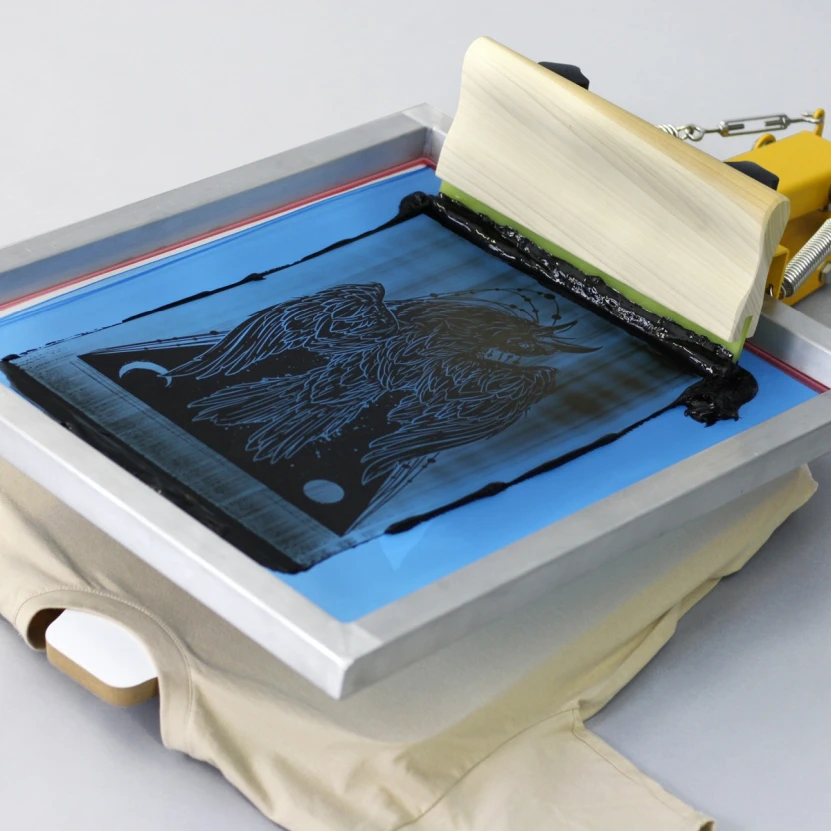
Apply ink to the upper part of the screen in sufficient quantity. First, spread the ink evenly and “fill” the motif without much pressure. Then, using a squeegee, press the ink through the screen and transfer the motif onto the substrate. The squeegee should be medium-hard to push the ink correctly but not damage the screen. Move the squeegee smoothly and evenly. After printing, slowly lift the frame and let the printed material dry. It is advisable to first apply spray or liquid adhesive on the printing board to prevent fabric or paper from sticking to the screen.
9. Fixing the Ink
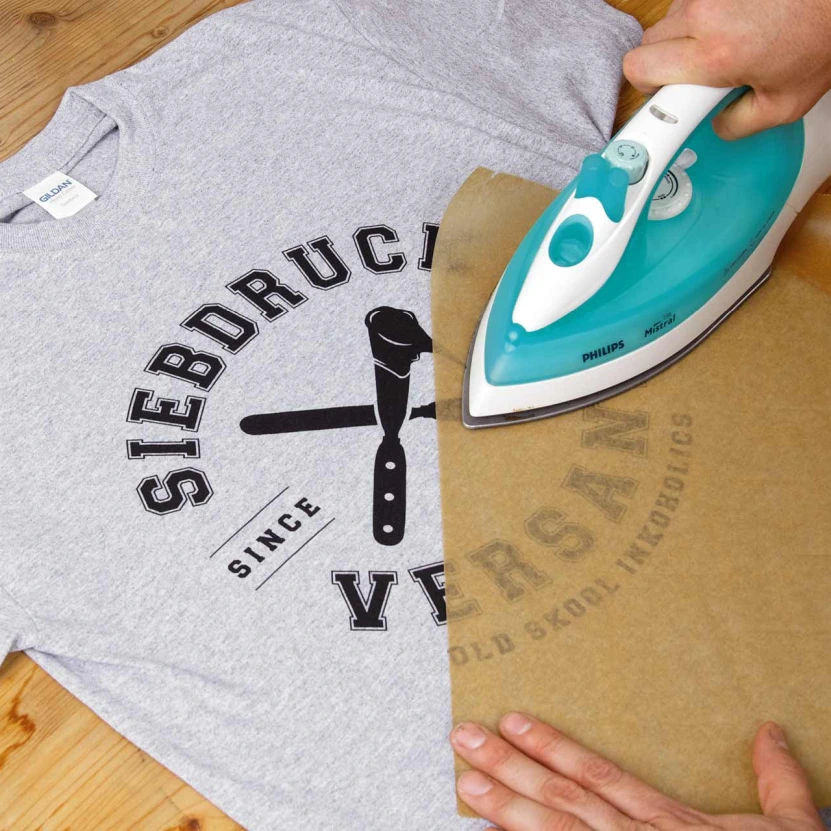
After printing, let the ink dry in air, or speed up drying with a hairdryer. On textiles, the ink must be fixed afterwards with an iron (set according to ink type) or in a dryer to withstand washing. When ironing, place a piece of baking paper between the iron and the fabric to protect the pattern. Fixing ensures the ink adheres firmly to the material and the print endures repeated use and washing. For paper, natural drying is often sufficient, but dryer use can help here too. For more even fixing, a heat press is recommended.
10. Cleaning the Screen and Removing Emulsion
Immediately after printing, clean the screen of ink residues with water and cleaning agents designed for screen printing. This prevents the ink from drying and clogging the mesh. If you want to remove the stencil and prepare the screen for a new motif, use a special emulsion remover. After degreasing and cleaning, the screen can be reused for applying new emulsion. Proper screen care prolongs its lifespan and maintains print quality.